[ad_1]
Making the transition from a tank novice to a veritable Sherman is a long-winded and treacherous route without proper guidance. The difference between coming away from a game with a couple of kills and topping the leaderboard is in the details, and boy, doesn’t War Thunder have a lot of details.
The simulation elements in this tank game mean that emerging victorious from an armoured scrap requires a great deal of thought, concentration and strategy. Armour angling, penetration values and shell types add complications to the basic question that plagues every tank commander’s mind: can I explode it before it explodes me?
Answering that question involves far too much maths, so instead here are some basic tips and tricks to use in War Thunder’s Ground Forces game.
Know your tank
A simple tip, and one you can do before even entering battle. Knowing your tank, from its armament and armour thicknesses to its speed and crew positions, is essential to understanding why you just lost out to an inferior tank. Spend some time in the Hangar observing your tank in x-ray mode and learning the specs and you’ll know which areas of your tank to hide from enemy fire and how effective you are at dealing it back.
Paying attention to your vehicle’s top speed and weight will also offer you hints as to what combat role your tank is best suited for. Light and fast tanks make excellent assault vehicles and are particularly effective at capturing objectives. Slow and heavily armoured tanks will require a more careful approach but offer their ability to soak up heavy damage as recompense.
Angling will save your life
And we don’t mean fishing.
So, you’ve had a look at your tank and discovered your armour is thickest at the front. The logical next step: face any and all threats head on, show nothing else to your enemy. War Thunder’s ballistics mechanics are more sophisticated than that, however. The slope and angle of your armour effectively increase the thickness of your plating as well as the likelihood of shells bouncing or ricocheting off without doing any damage.
Therefore, in most circumstances the ultimate position to be in when facing an enemy is at a 45° angle. Despite this exposing your side armour, the increase it provides to your armour value makes it an essential tactic and will help you get the most out of your tank.
Using the right shell is key
Spend a little bit of time with any one tank and you’ll soon find a wide range of shell types at your disposal, each useful in their own right. Having the right shell equipped is key to dominating Ground Forces, from single purpose speciality casings to solid all-round tank destroyers.
Here are some acronyms to keep in mind: AP (armour-piercing), HE (high explosive) and BC (Ballistic Capped). The most general use shell in the game is an APHE as it provides an ideal blend of penetrative capability and explosive damage. HE rounds might tempt players with their damage potential, but their inability to penetrate makes them practically useless against most tanks. Speciality shells like APCR and HEAT are worth experimenting with but require precision to mete out significant damage.
Stay hull down
In almost all military and combat scenarios, holding the high ground is key. As a general rule of thumb, doing so early on into your War Thunder career will get you killed. Tank turrets can generally raise more than they can lower, and being up high reveals your tank’s most vulnerable areas for all to target.
Staying hull down is the practice of keeping the bulk of one’s tank behind cover while leaving the turret exposed. This allows tankers to continue firing while keeping most of their vehicle completely protected. This is best done using natural cover and can be the difference between life and death in a one-on-one encounter with an enemy tank.
Make your shots count
You can unload as many shells into a tank as you want in War Thunder, but if they’re not hitting anything valuable you might as well be missing. War Thunder utilises specific damage values and modules for every tank. Crew positions, ammo racks, fuel tanks and just about anything you’d expect to be important in an actual tank are the objects you’ll want to be hitting if you want to get some kills under your belt.
A single shot at a weak spot can wipe out the whole tank crew, hitting an ammo rack can set the vehicle ablaze, damaging a tank’s tracks will leave it immobile, allowing you to circle it and deliver a fatal blow. A well aimed shot is infinitely more valuable than a hundred misplaced ones. Look for gaps in the opposition’s armour – they might be miniscule, but firing at these weak spots will net you kills faster than anything else.
Play your role
Obvious as it may sound, a scout tank like the T-50 won’t be able to trade blows with a heavy tank like the KV-1. If you’re rolling into battle in a light tank, your job should be to capture points and scout out the enemy – AA vehicles and other light vehicles are worth picking fights with, while everything else should be avoided at all costs.
Conversely, heavy tanks and some tank destroyers are fierce sniping platforms, making them ideal for holding down any open expanses of land. Medium tanks are more versatile and – depending on the specific vehicle – can be used for anything from long-range duelling to defending a capture point. Sticking to your role on the battlefield will make you more combat effective and help your team to victory.
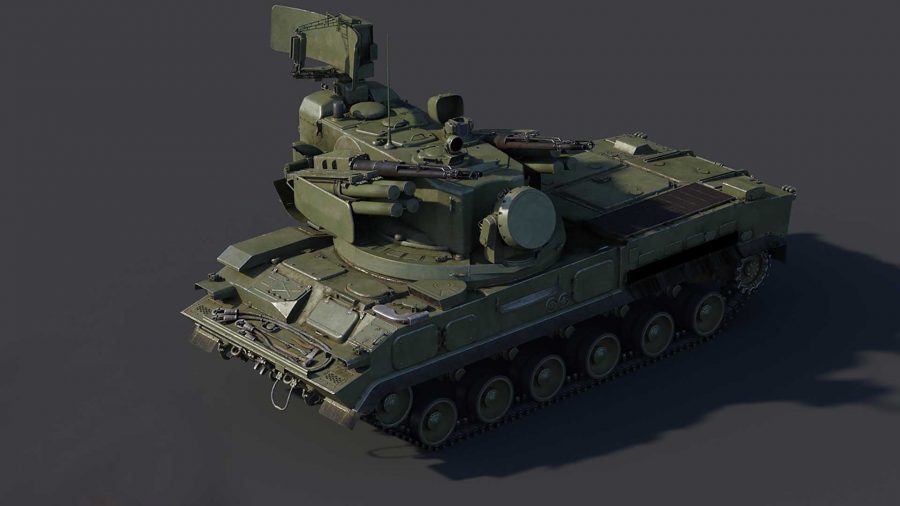
Keep in mind that some tanks have uses outside of their historical and intended role, so if you see someone turning tanks inside out with an AA vehicle like the T17E2, don’t be deterred from experimenting with it yourself.
Ramming is pointless
It used to be the case in War Thunder that ramming was a genuinely effective tactic… in aerial battles. Why gamers have carried that fine tradition of instant fiery death through to Ground Forces is beyond any tanking veteran’s comprehension, but ramming is still painfully prevalent.
While it is possible to do damage and even defeat a tank by ramming it, in most circumstances it’s the rammer – if that’s the correct term? – that comes off worse. No matter how last-ditch or tempting it might be, you’re probably better off sitting tight and waiting until you can fire again than you are crashing into your enemy. Damage to the main turret and tracks, as well as finding yourself within fatal range of the opposing tank are all valid reasons to avoid this rudimentary tactic.
Do your homework
Equally as important as knowing all there is to know about your own tank, being aware of some basic weaknesses and strengths of other tanks can be a lifesaver. If you keep coming up against the same tank and losing, it pays to comb through its stats in the game’s menu. Keeping an eye out for armour vulnerabilities, offensive frailties or knowing to simply keep a bit of distance between you and a certain type of tank will keep you involved in the battle for much longer.
Even the slightest details can give you the edge over an opponent. A slow turret traverse speed on an otherwise solid tank is its achilles heel if you’re able to circle it. Likewise, knowing where a tank’s ammo racks are will give you a chance to take it out with as few shots as possible. As the old cliché goes – in War Thunder, knowledge is power.
Don’t just stick to Arcade
Ground Forces is split into three game modes: Arcade, Realistic and Simulator. Arcade is the friendliest of the lot, which is why most newcomers start there. In Arcade your tank will move and turn faster, spotted enemies are marked on your map, there’s a subtle aim assist and teams can consist of vehicles from any nation. It’s the easier, more digestible way to play, but it’s not War Thunder at its most engaging.
The best Ground Forces action is to be found in Realistic and Simulator battles, and if you spend too much of your early career in Arcade, making the leap to these more hardcore modes is a no mean feat. So don’t be afraid to try out these game modes early on to get a feel for how they work, as you probably won’t want the game to hold your hand when you’re entering the higher vehicle tiers.
[ad_1]

